
MusicMaster Blog
Take Shortcuts! posted on November 29th, 2023
by Chris Hulsether
If you like to use your keyboard to hit a button or two and get where you want to go, you’re in luck! MusicMaster has all sorts of ways to help you whip through your database quickly and efficiently using your keyboard.
In this article, I will go over the many ways to use keyboard shortcuts. We have basic default keyboard shortcuts that can be used in your Library Maintenance, Schedule Editor, and more. Also, I’ll show you how to turn on and use our Hotkey Emulator, which will bring shortcuts you may have used before with other music scheduling systems. We also have a way to add your own customized hotkeys.
MusicMaster Shortcuts
For reference, you can print off the list of all the shortcuts we have in the software. Go to Help/Index and search “Shortcuts”.
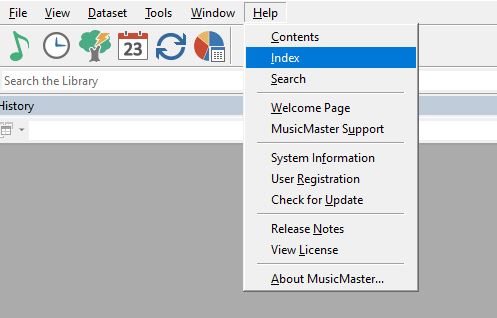
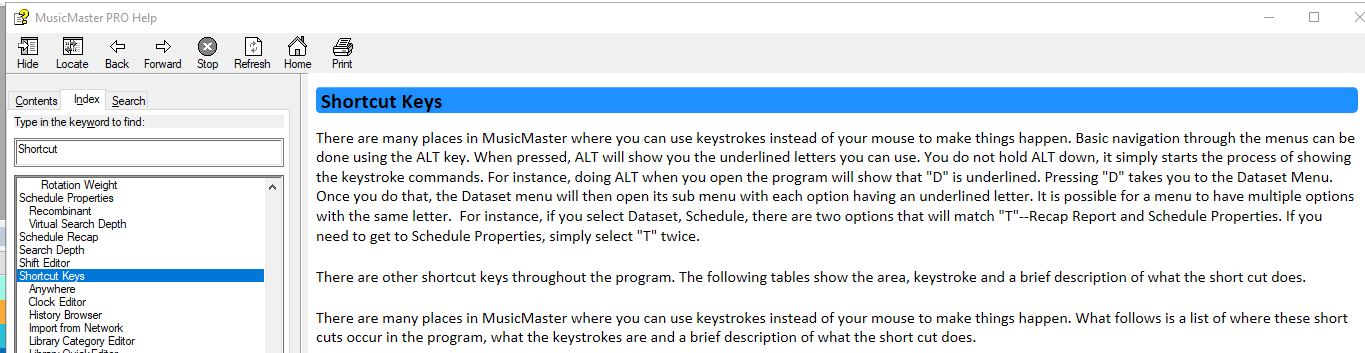
Then click Print and print to paper or PDF and save it where you want.

Here are some helpful shortcuts you can use in Library Maintenance:
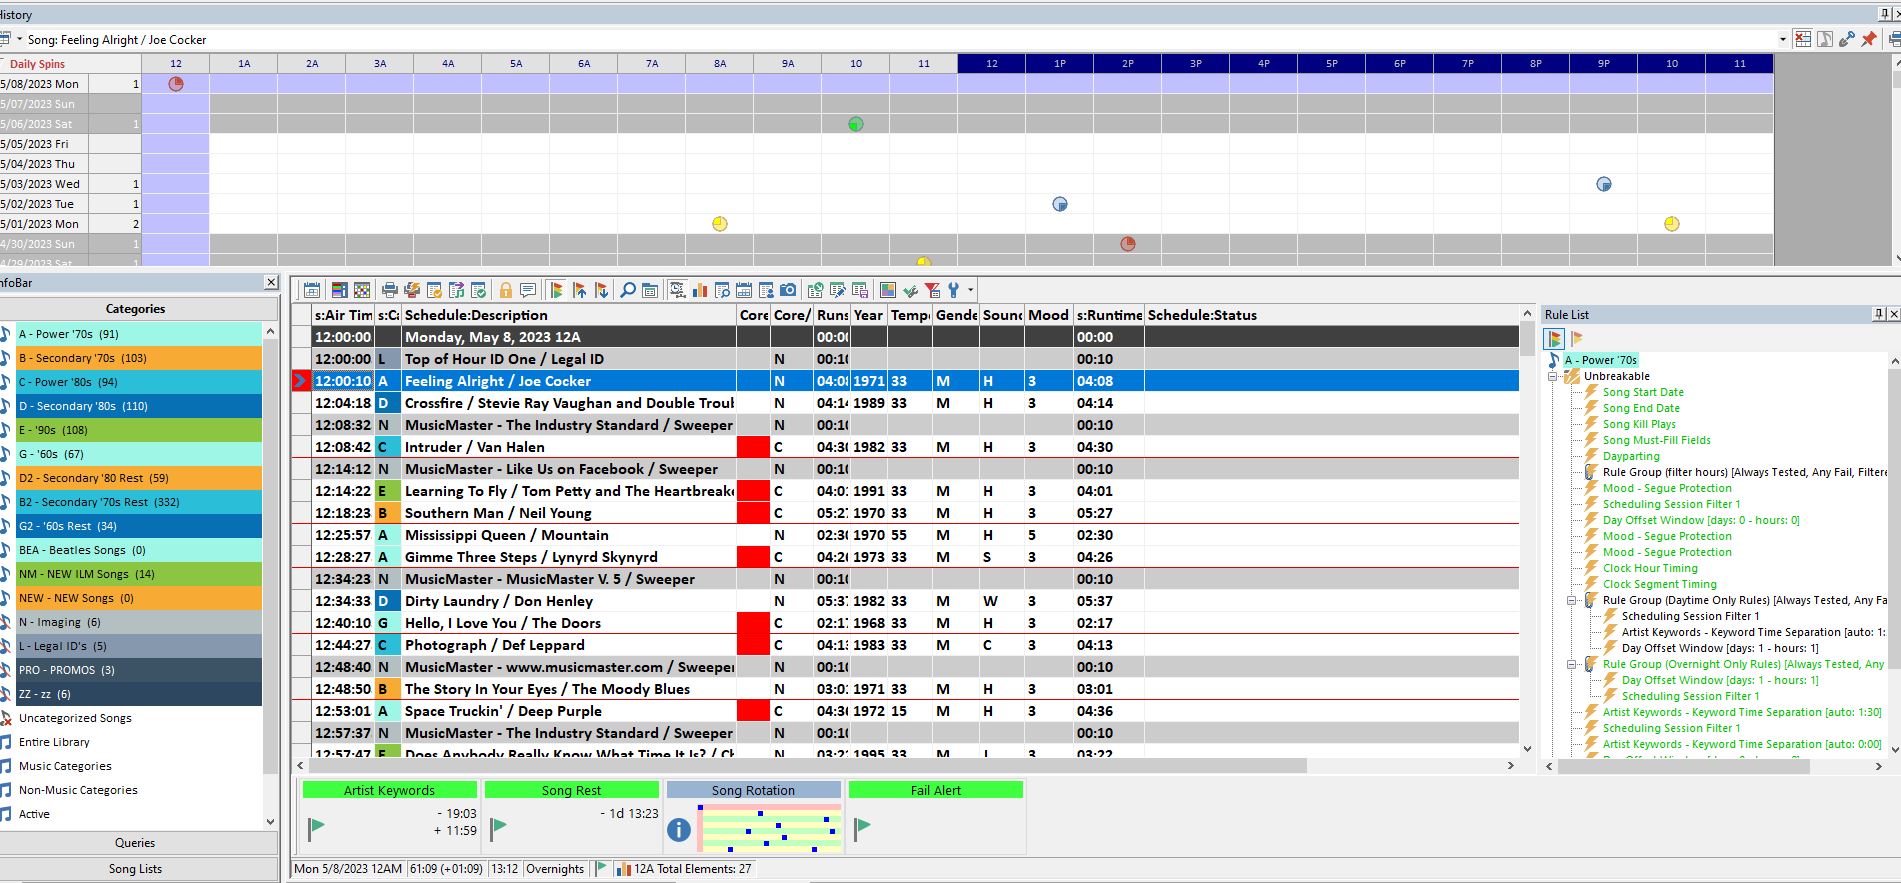
For example, you can hit F6 to view your History Graph and review how a song has scheduled throughout the weeks. When you need more room to review other songs in your library, hit F6 again and the graph closes.
F7 allows you to Mark a song. Typically, it’s marked in powder blue. You can mark songs for reference or use this to perform batch operations on all marked songs. If you right-click on your library grid to open the context menu, you’ll see options available for marked songs, such as Move, Copy, Delete, Merge, and Print.

Hit ALT+ F7 and the marking song utilities will open.

If you have a bunch of marked songs, SHIFT+F7 will jump to the next marked song.
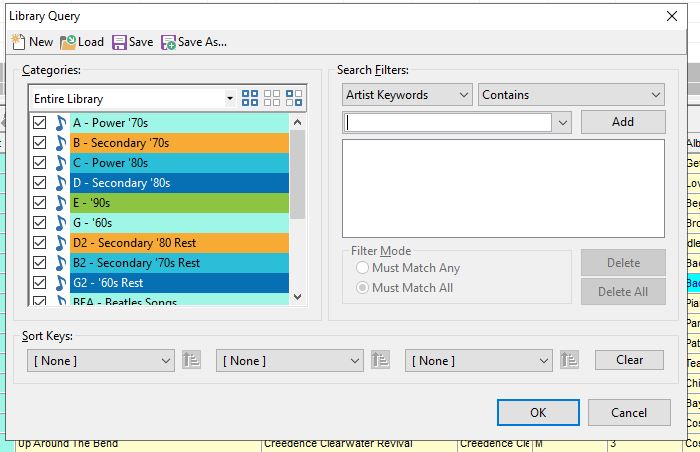
You can also open the library query window with CTRL+Q to search your library for specific things. Whatever field you are in when you hit CTRL+Q will become the search filter. For example, if you are in your Artist Keyword column and hit CTRL+Q on a song, the query window will already be set to search Artist Keywords.
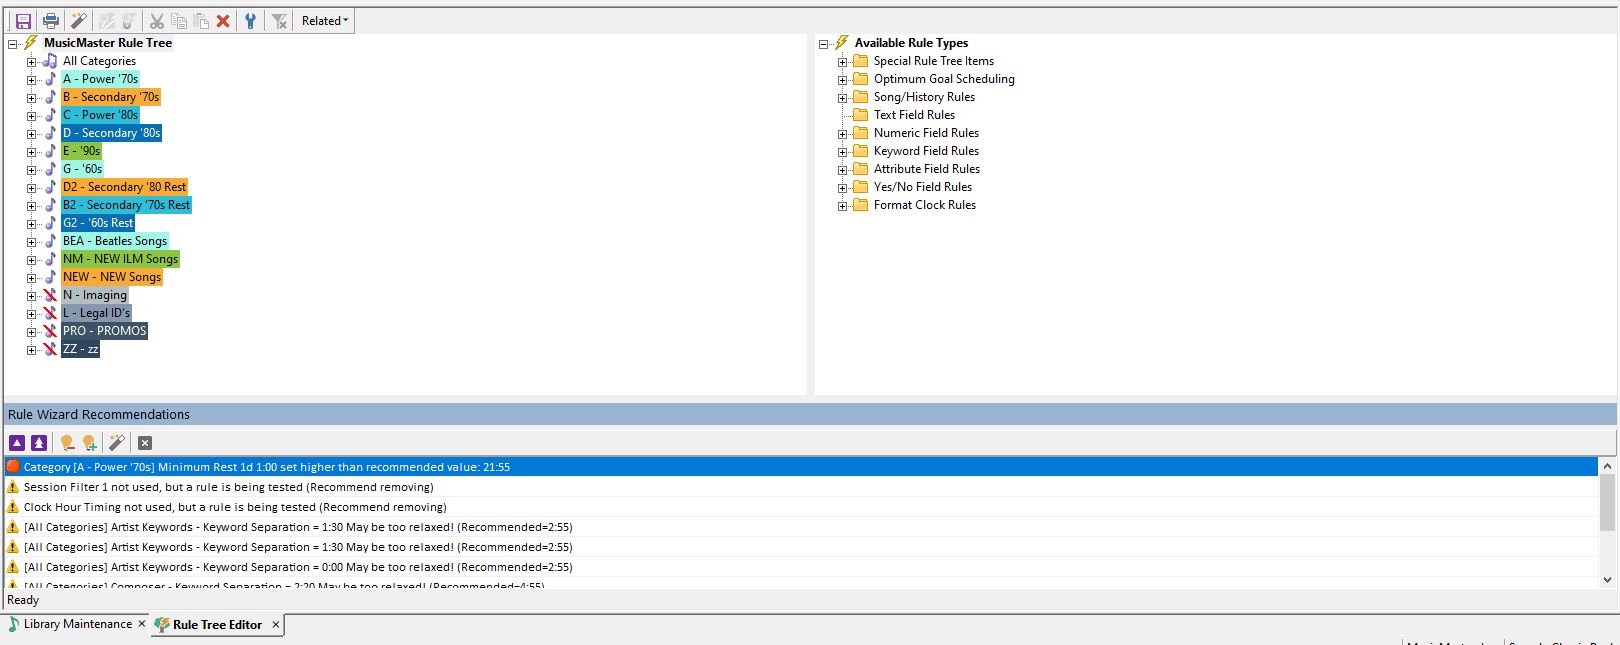
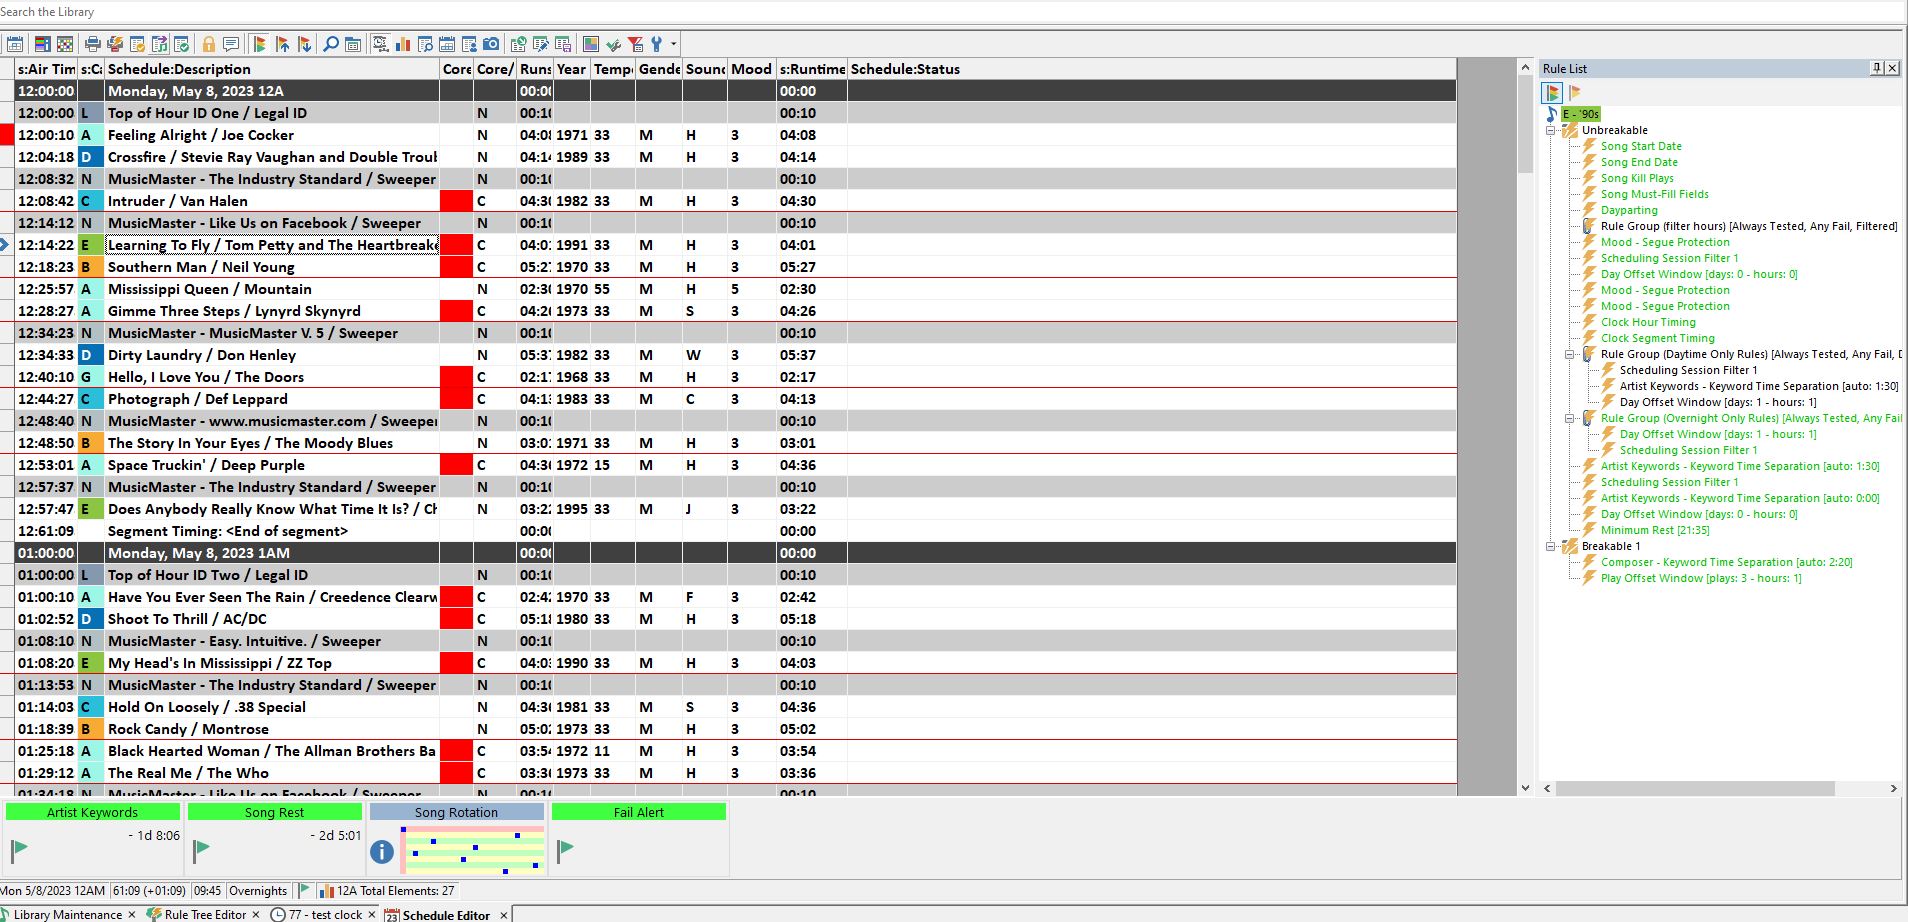
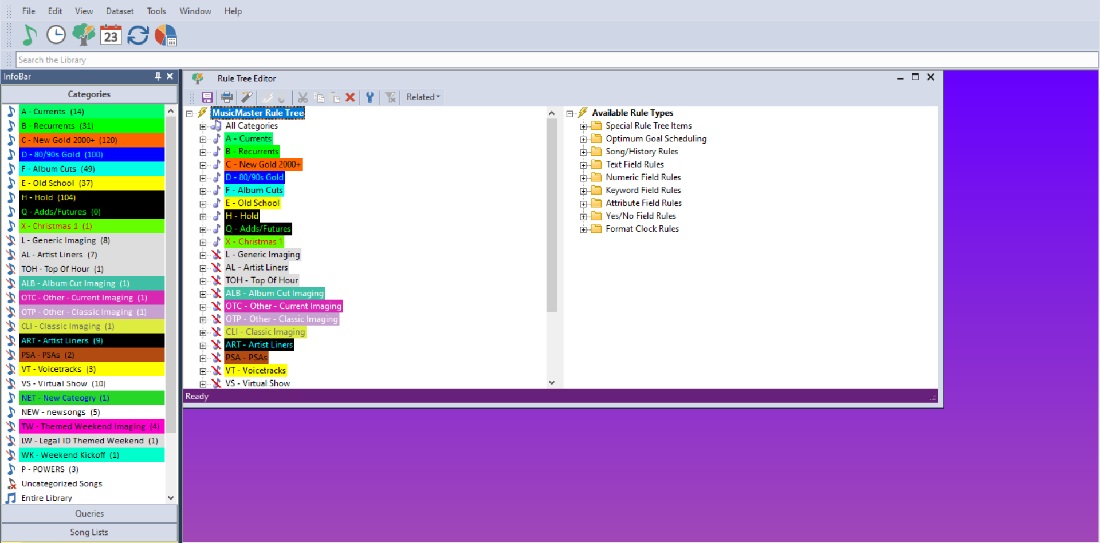
Heading over to the Rule Tree, you can use CTRL+W to open the Rule Tree Wizard and see recommendations for changes. (Learn about the Rule Tree Wizard here).
In the Schedule Editor, you can use F5 on two songs to swap them. Select the first song you want to move, hit F5, and you will see a red mark on the left side. Then select the other song you want to swap with and hit F5 again. The two songs will swap positions.
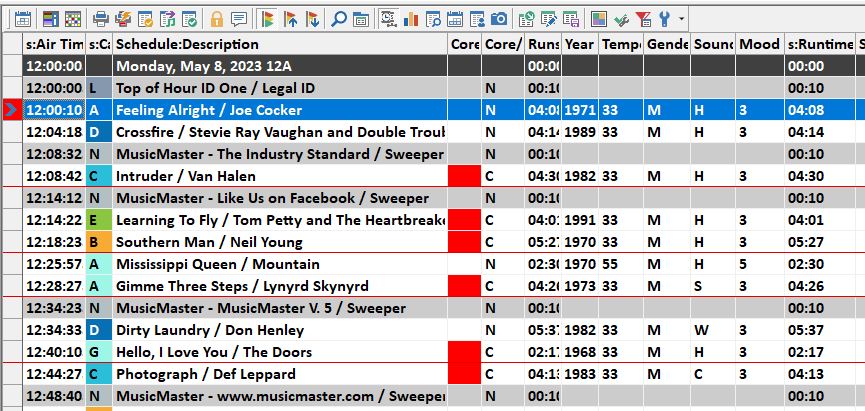
If you want to have more space to see your log and you have the History Graph and InfoBar open, you can toggle them on and off with F6 for the History Graph and F11 for the InfoBar.
If you have rule failures or unscheduled positions as a result, you can use shortcuts to jump to each so you can replace the song. Hit CTRL+N to go to the next rule failure and Ctrl+P to go back to the previous rule failure.
HotKey Emulator
How about those Hotkeys you used to use in other software and still have the muscle memory for?
Go to Tools/Options/Additional Options:
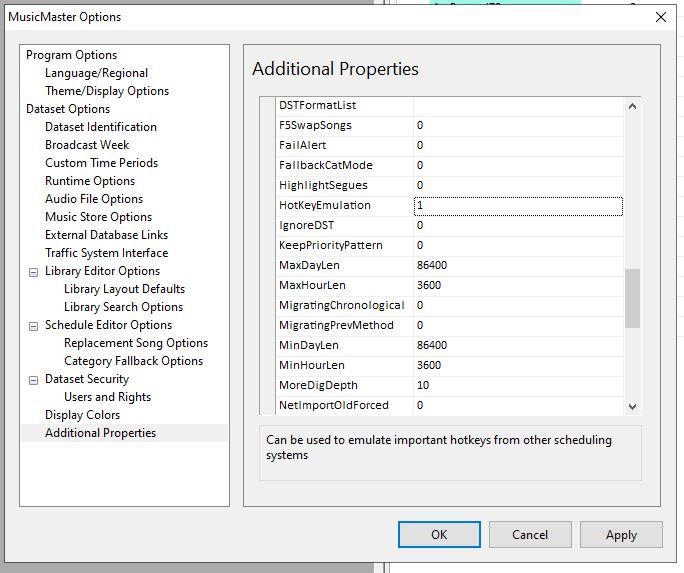
Change Hotkey Emulation to a 1 and these shortcuts will be turned on.
These hot keys will work on any non-editable field in the Editor. It changes nothing when you are in an editable field like Artist or Title. These functions are available:
1 – Search for songs where the Auto Match field matches the current song
2 – Search for songs where the Auto Match field matches the previous song
4 – Open the Vicinity Viewer
A – This requires the Additional Properties, AutoMatchField to be set to the Field ID of the keyword you wish to use. With the history graph then open, pressing “A” will change the graph to show the keyword display.
G – Select a song from a saved song list, where it first opens a box allowing you to select a saved list.
J – Swap songs
K – Load songs from the category of the current song into the replacement song window
O – Undo
Q – The Q Filter pops up a list of song attribute codes to search for
S – Schedule from selected category where a pop up lists the categories and the songs from that category
U – Unschedule the active element
X – Toggle the Element Mask to show/hide music and non-music elements
Y – Opens the Yesterday Window (the MusicMaster Schedule Review showing the log from the previous day)
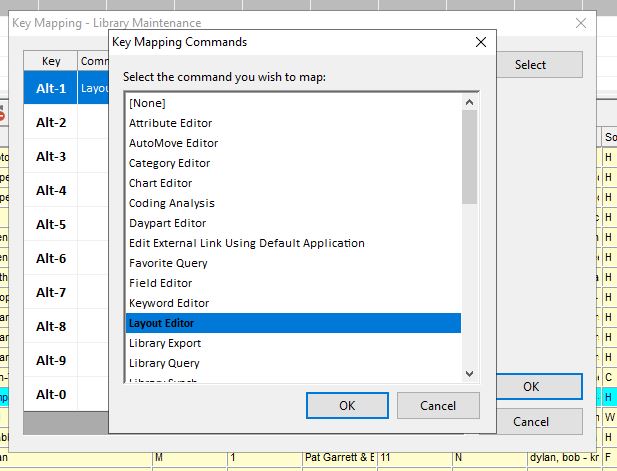
Custom Key Mapping
This is where you can add some customization to your Shortcuts. It’s available both in the Library and Schedule Editor.
Let’s look at how to set this up in Library. Open your Library Maintenance, then go to the menu bar and click on Library > Key Mapping.
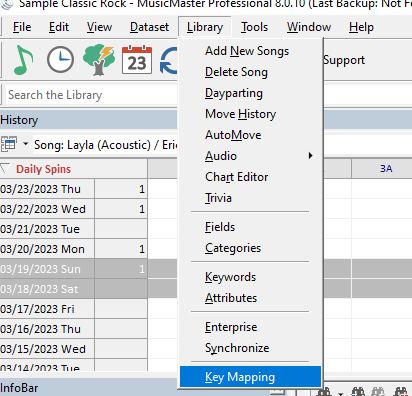
Now, you can add shortcut keystrokes to use while you go through your library.
Select the key you want. I selected ALT+1 for layout editor. This allows me to pull up the grid layout editor and add/remove things from my library grid. You can set one for saving your changes or loading a different layout.
You can do the same to bring up things like the Attribute editor, Keyword editor, the Mass Changer and many other tools.
In the Schedule Editor, you can do the same. Shortcut options include various audio playback controls, replacement song functions, history snapshots, publishing to automation, navigating within your logs, toggling between layouts, and so much more!
Today more than ever, you need ways to take a shortcut and get more out of your database in less time. Contact your Music Scheduling Consultant for assistance.
“U Got the Look” Customizing MusicMaster posted on October 27th, 2023
By Dave Tyler
I am sure you’ve noticed that just about everything these days is customizable to your preferences. MusicMaster is no different. Some of us spend many hours a week in front of our computers using MusicMaster, so wouldn’t it be great if you could make it look just how you wan it to? Well…YOU CAN!
Of course you can color and style your categories by going to Dataset/Library/Categories and then choosing the Properties button.

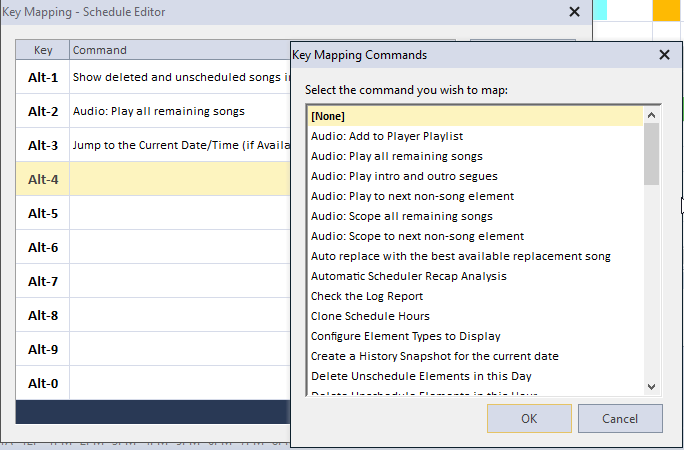
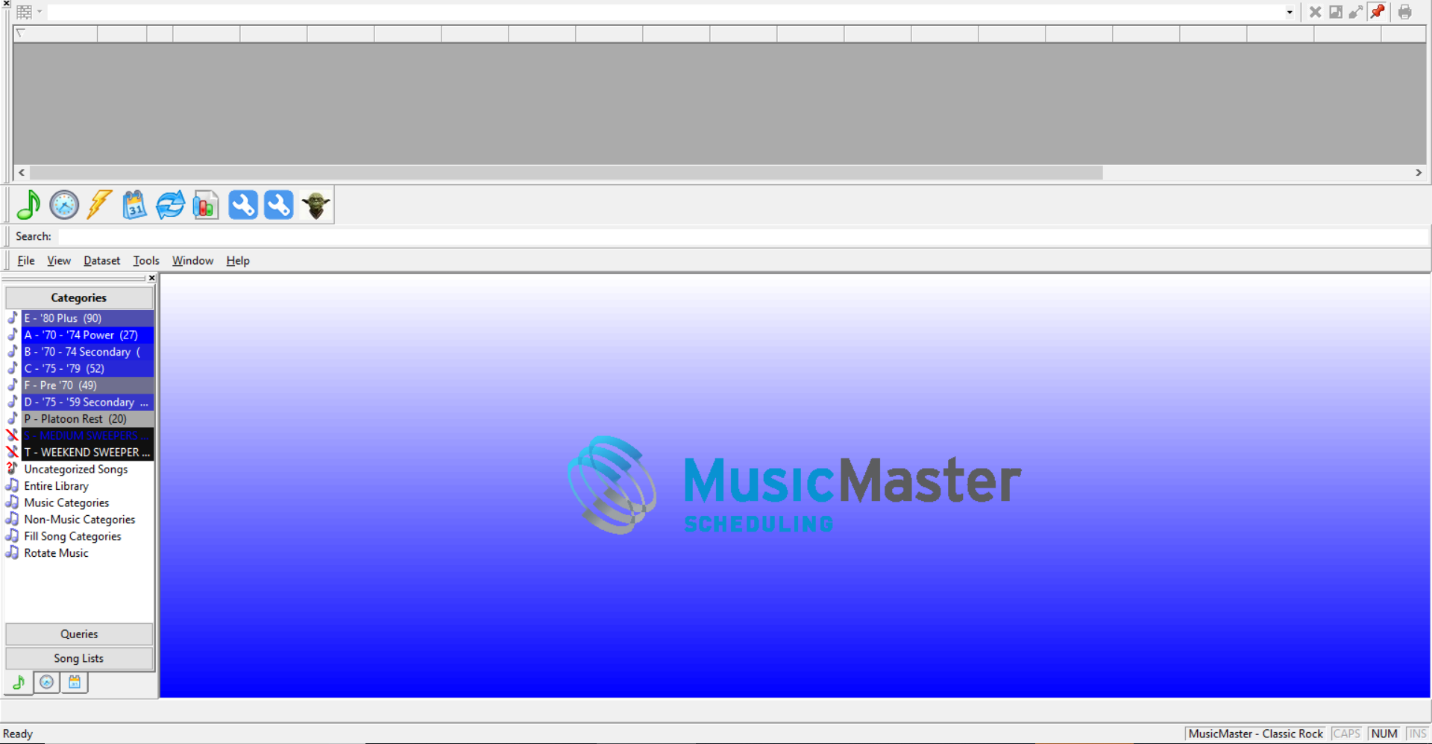
You can even add your favorite picture or station logo to the background of the main window by going to Tools/Options/Dataset Identification.
And just like that my sweet looking logo is right there!
![]()
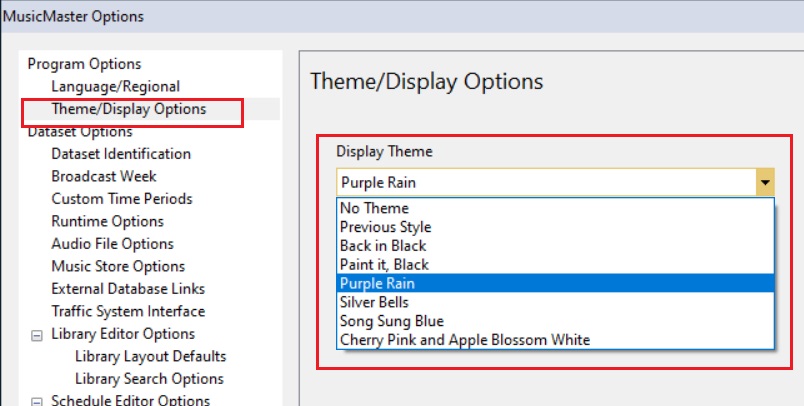
But wait, there is even more ability to customize in the Tools/Options area. See where it says Theme/Display Options? That’s the spot.
The title of this blog was inspired by the Prince song of the same name, so let’s dig in to some of the cool premade themes the MusicMaster team already has ready for you to use. Let’s start with “Purple Rain”….pretty cool don’t ya think?
I think it is pretty cool that there are several premade themes for you here to explore and play with.
For those of us that like simple, then you can choose No Theme. Or if you recently updated to version 8 from let’s say version 6 you might prefer the old style of icons you had in 6. Selecting “Previous Style” will get it back to that look for you.
We’re in radio…. This is supposed to be fun right? I love it when I am helping a client and I see that they have totally made the program to look the way they want to see it. I have seen some crazy color schemes, etc. We spend a great part of our lives working and cultivating the sounds of our radio stations. Enjoy it….your way!
Customizing Your Results Bar posted on March 9th, 2023
by Paul Ziino
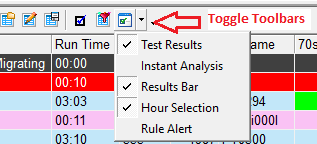
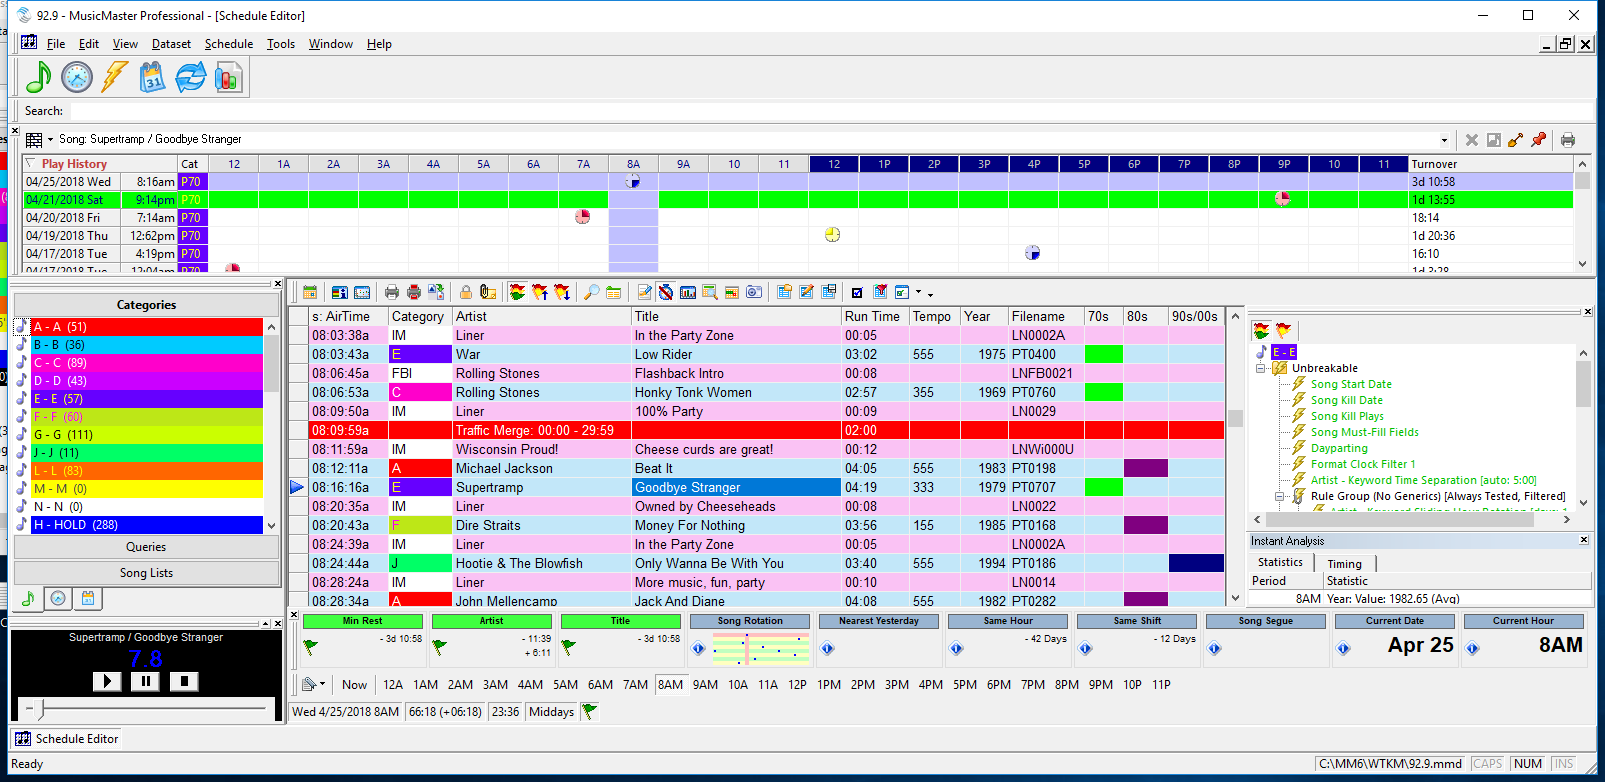
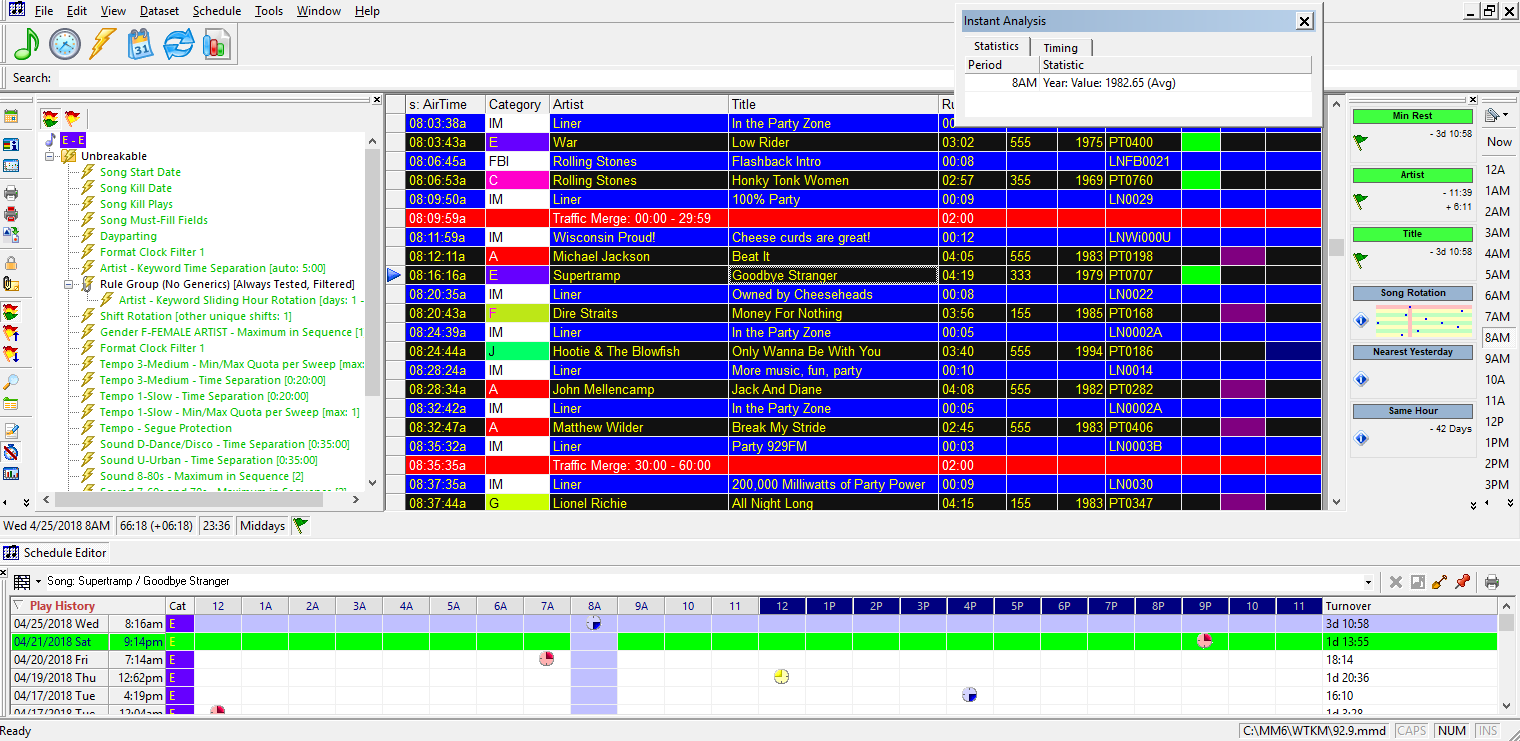
The Results Bar in your Schedule Editor can be set up to show a variety of information about the active song in the log. Today we review the various options.
To turn on the Results Bar, click the pulldown on the right side of the wrench icon (Toggle Toolbars) then check “Results Bar.”

The first time you turn on the Results Bar it may be empty, or it may populate with a few items right away. Either way, you can customize it by right-clicking within and selecting Customize. You will be presented with a Customize Results Bar window that looks like this.
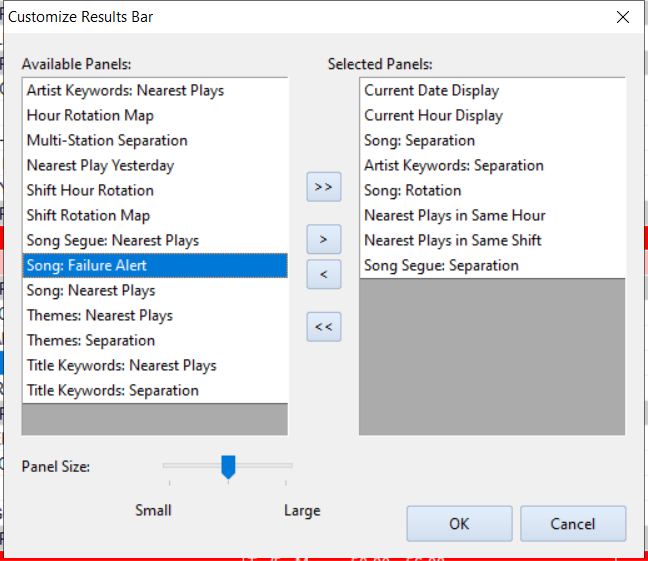
You will see available panels for any Keyword field’s Separation and Nearest Plays, Current Date and Hour Displays, Hour Rotation Map, Multi-Station Separation, Nearest Play Yesterday/Same Hour/Same Shift, Shift Hour Rotation, Shift Rotation Map, Song Segue Nearest Plays and Separation, Song Failure Alerts, as well as Song Nearest Plays/Rotation and Separation. Following is a breakdown of each and what they mean.
Current Date Display and Current Hour Display
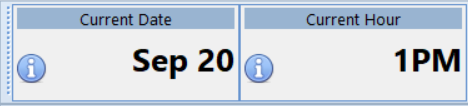
This tells you where your cursor is, on the date and hour.
Hour Rotation, Shift Hour Rotation, and Shift Rotation

Hour Rotation shows the song plays leading up to the play where your cursor sits.
Shift Hour Rotation shows the plays of this song within the same shift and indicates what shift that is.
Shift Rotation shows the shift sequence in which the current song has played, with dashes on either side of the current play selected.
Song Segue Nearest Plays and Song Segue Separation

Both these panels tell you similar information. Note that the segues are looking at the song where the cursor resides and the song that played before it. Song Segue: Nearest Plays looks back and ahead to when these two songs last played together (in either order), and when they will play together next (in either order). Song Segue: Separation displays this same info, but as a total of Days/Hours/Minutes.
Song Fail Alert, Nearest Plays, Rotation, and Rest

Song Fail Alert will display in Red if the active song violates an unbreakable rule, yellow if the rule is breakable, or blank if no rules are violated.
Nearest Plays tells you the date and time when that song was last scheduled or scheduled next time.
Song Rotation is a mini snapshot of the last 8 days of a song’s play history.
Song Rest tells you the amount of time back and ahead of a song’s play history.
Keyword Nearest Plays and Separation

Keyword Nearest Plays will show you the last/next time a keyword is scheduled.
Keyword Separation will show you the amount of time back and ahead that keyword is scheduled.
You will have a Nearest Plays and a Separation panel available for each keyword field in your database.
Favorites?
Of course I have my favorites—the panels I like to have in my display include Current Hour, Nearest Plays in Same hour and shift, Artist Keywords Separation, Song Separation, and Song Rotation.

Try the different panels out to figure out which work best for you and your station!
A New Look Resolution You Can Keep posted on January 28th, 2019
By Jerry Butler
Roughly 80 percent of people have already given up on their New Year’s Resolutions. Here’s one you can easily keep: updating the look of your MusicMaster. MusicMaster has always been known for allowing users to customize the database, views and more. In MusicMaster Version 7, we have added additional themes/display options and added category coloring options to freshen up your look.
Click on Tools, Options and Themes / Display Options. You can select various themes including Back in Black, Paint it Black, Purple Rain, Silver Bells, Song Sung Blue or Cherry Pink and Apple Blossom White.

To update your category color scheme, go to Library, Categories and selecting Color Schemes.

Not only are there numerous different pre-set color schemes, note you can apply one color set to your music and a different one to your non-music.
These options ensure you’ll keep at least one New Year’s Resolution in 2019!
If you have any questions, please contact your Music Scheduling Consultant.
Customize the look of your clocks in Version 7 posted on December 3rd, 2018
By Marianne Burkett
As I’m digging deeper into Version 7, I’m seeing things I’ve always dreamed of as a programmer.
First go to Tools/Options/Display Colors and set up this feature that has been in the program for some time. You can select colors you’d like to see for various elements in the clocks. In the capture below, I made Stopsets Deep Red and Lognotes Pale Yellow.
When building clocks, I love our “Pie” view. If you color your categories with various colors, it makes it simple to distribute the categories evenly through the clock.
Check out the default view in Pies which we’ve always had.
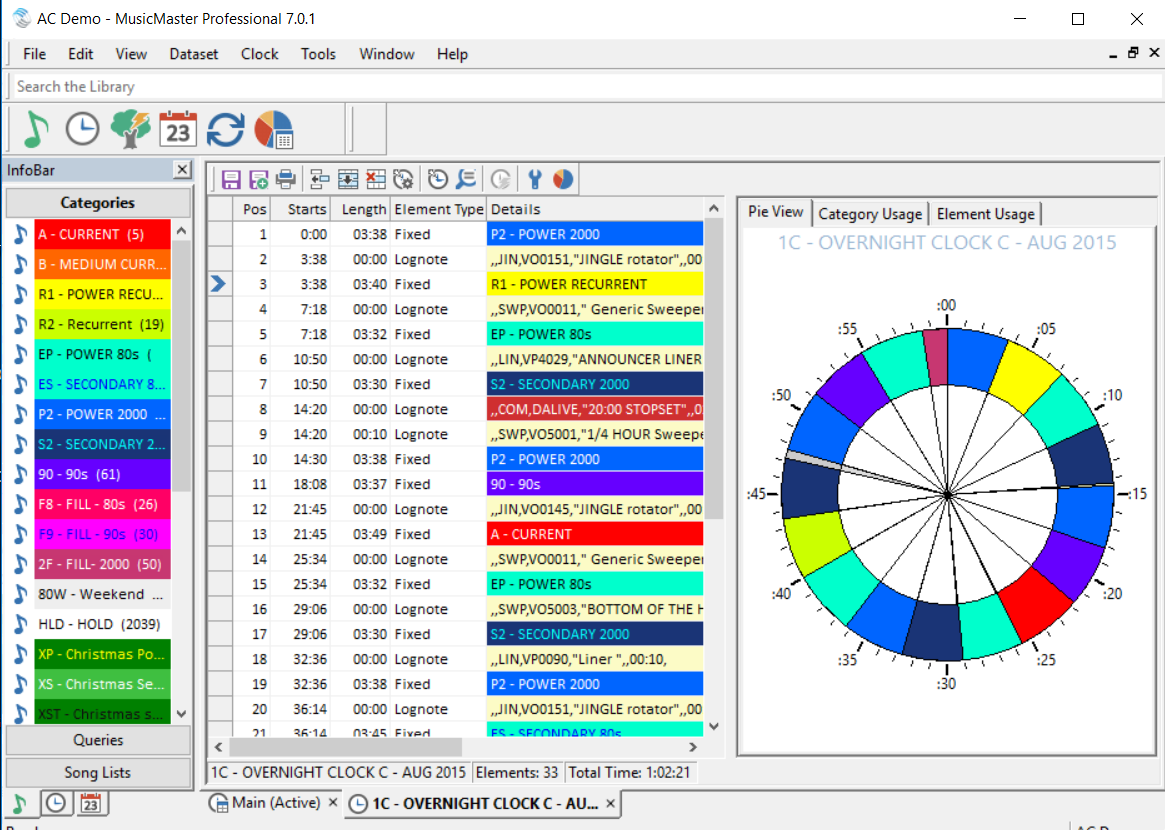
In Version 7, with a quick visit to Tools/Options/Additional Properties you can put the number “1” in “PieClockLabels” in the Clocks Section, and you get category code and element information in the pie view as well.
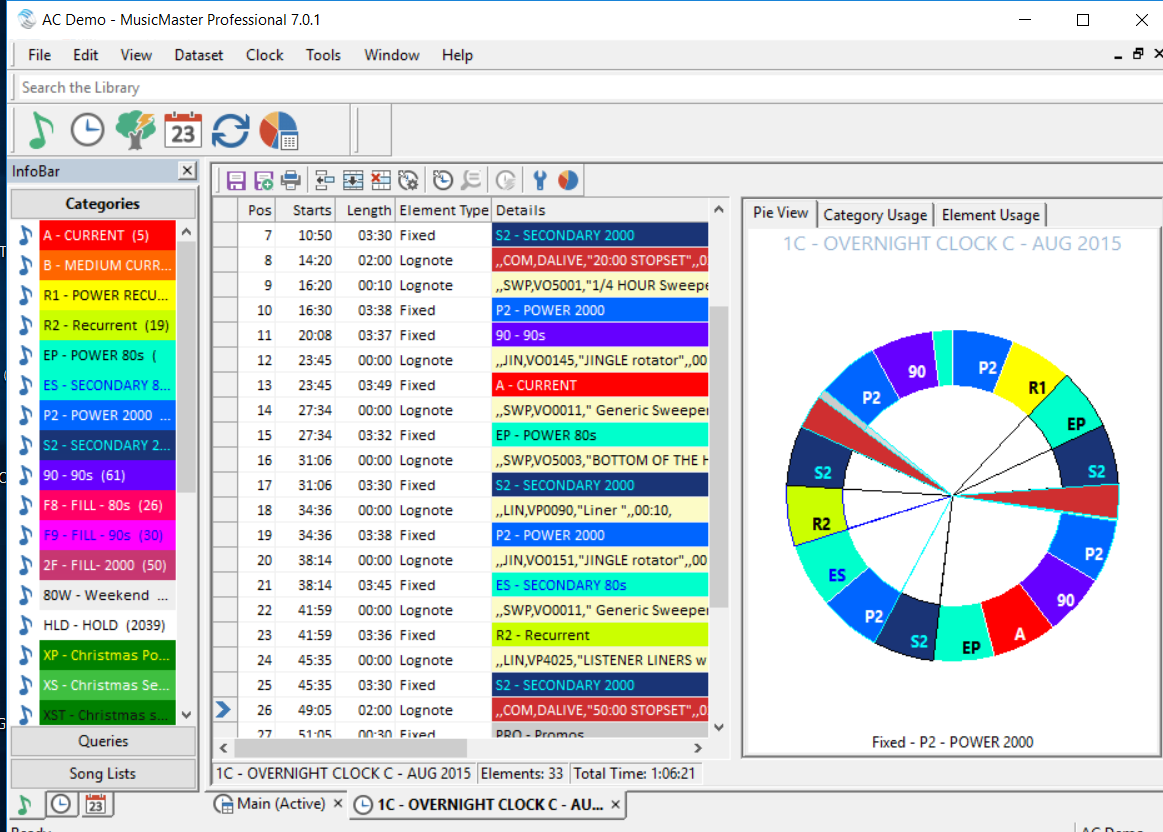
When you hover over anything in the pie you also get details about lognotes, music and non music descriptions below the pie. In the sample screen shot, my cursor was on a P2 Power 2000 category.
If you made a lot of clock changes and use the pie, this new feature can help in making sure they’re spaced out correctly.
If you’d like the video tour of new core features in Version 7, click the link below.
https://www.musicmaster.com/version7.php
Any questions, call your Music Scheduling Consultant!
Customize MusicMaster with Your Station’s Logo and Sweeper posted on September 24th, 2018
By Jerry Butler
In a time when many program directors are programming multiple stations, it can be really frustrating to find you have made changes in one database, when intending to make those changes in a different database. MusicMaster gives you the ability to customize multiple settings throughout the software for a different feel and look for each database. Many programmers have cloned databases to create a new station. This works great, but copies everything including your categories and category colors over to the new database, making it difficult to tell them apart. A very easy way to customize each database is by using a station logo or sweeper when you open the database. Here is how you can set up these features.
Click on Tools, Options and Dataset Identification. In the first field, you can change the name that you see on the top left of the screen when you have the database open. This can differ from what the actual database file is called when opening up MusicMaster.

The next field allows you to set up an Audio Logo (Sweeper, Liner, Favorite Movie Drop). Click on the button to the right of the audio logo field to search your computer for an audio file you would like to play when opening the database.
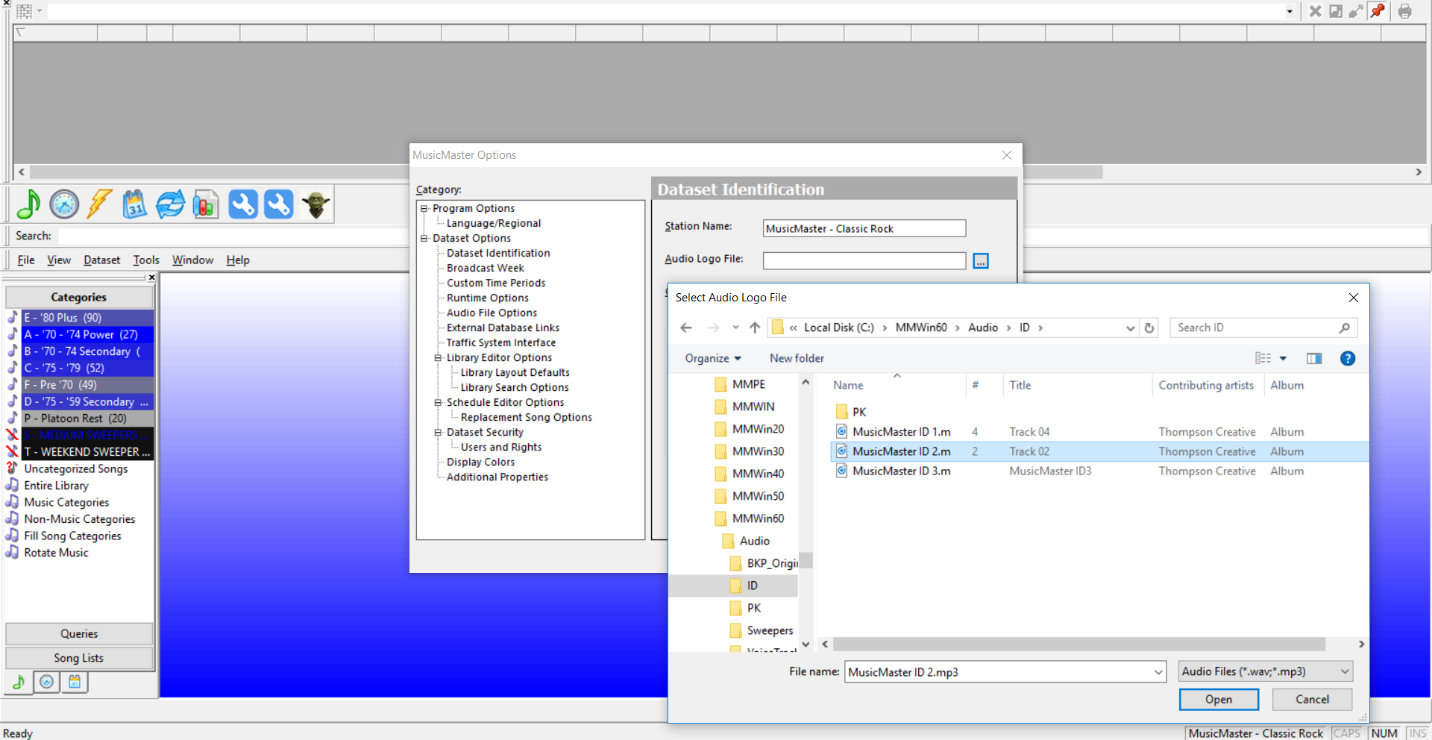
The next field allows you to show a Graphic Logo file. Click on the button to the right of the field to find a file on your computer that you would like to show in the main window of MusicMaster upon launch.
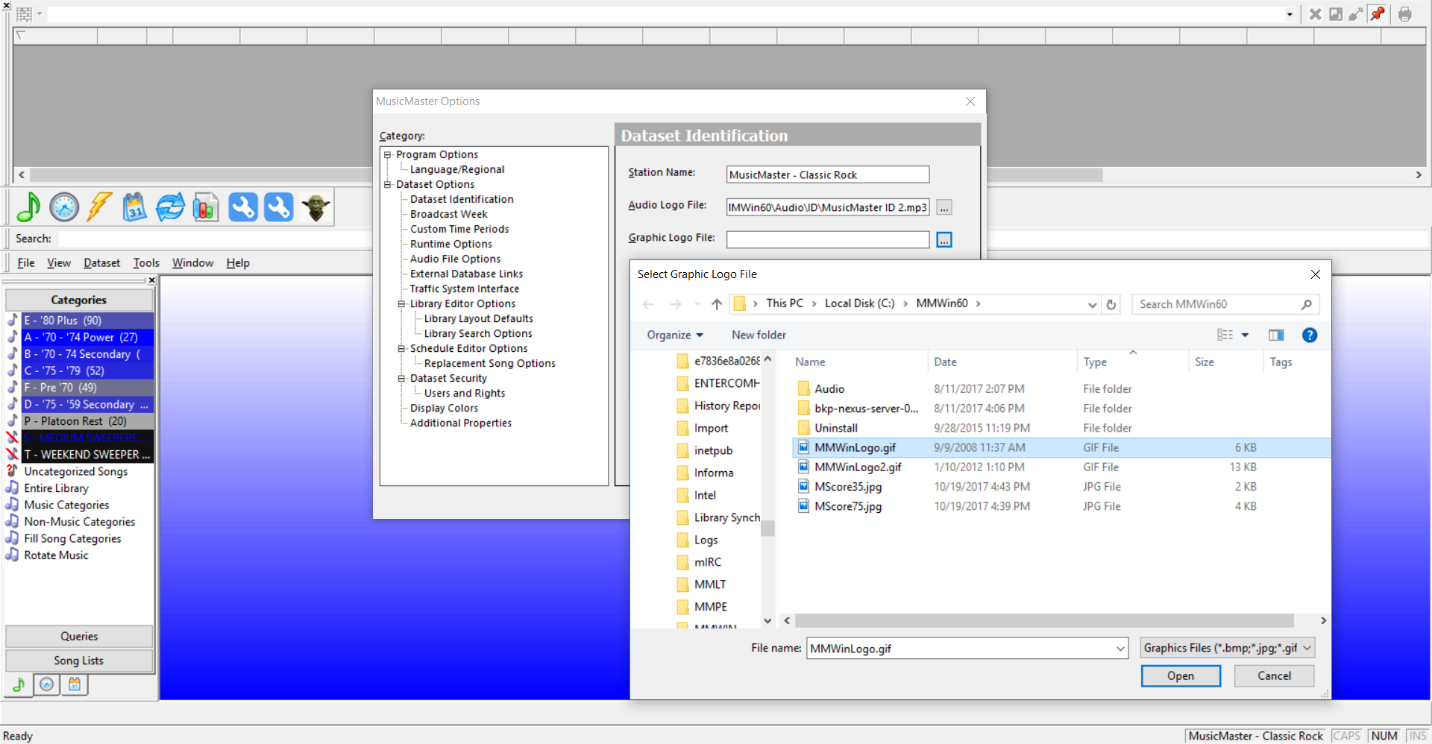
Once the file is selected, you need to click display the graphic logo file check box. You can also adjust the position of the logo with the dropdown selection and choose to have the background as transparent. There are also settings for a background color with or without using a logo.
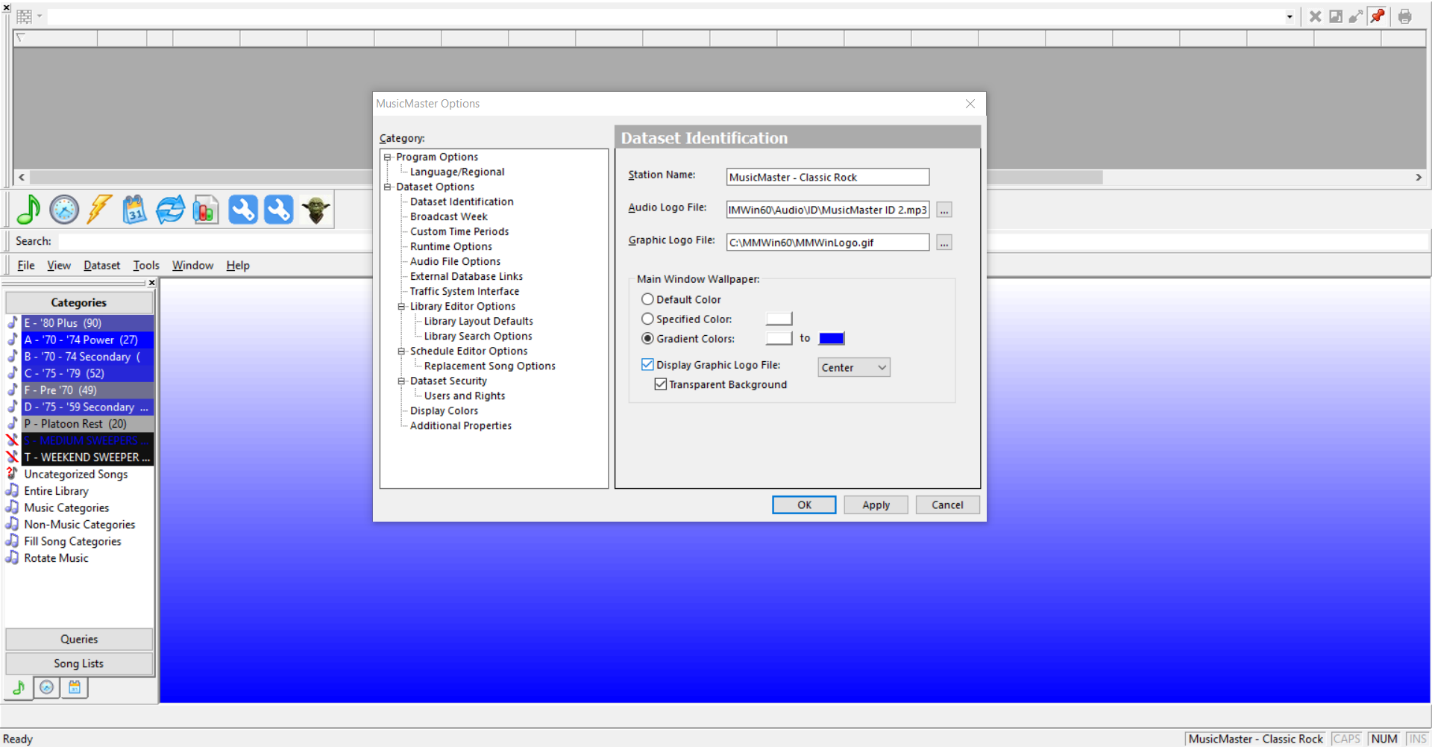
When you open the database you will now see your logo and hear the audio you selected.
Play with the setting and get the database customized the way you want it. Happy Scheduling from MusicMaster!
Schedule Editor Layouts posted on August 27th, 2018
By Paul Ziino
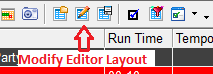
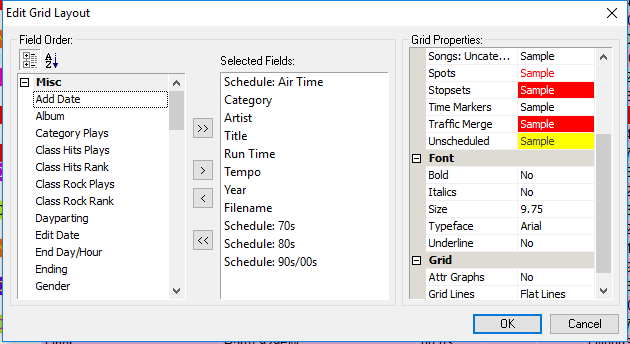
You can really make your Schedule Editor look just about any way you want. You can add and subtract fields via the Modify Editor Layout icon.
 Here you can also change the font, size, colors, and grid attributes.
 Click the Toggle Toolbars icon and you can turn on the Test Results panel, Instant Analysis, and more.
 Once you’ve turned on the Results Bar, right-click on any panel and select Customize to see all the different items available for review.

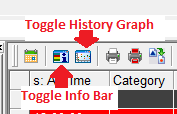
And with other icons you can toggle the history graph on and off, as well as the Info bar.
 With Show/Hide Elements you can hide different elements from view.
 You can turn off lognotes, only display the unscheduled items, hide specific categories, display hour and day counters, and more!
 Get it all set up just the way you want it, and you have a completely customized workspace!
 And with a few clicks and drags you can rearrange the whole thing and some color adjustments, you have a whole new look!!
Customization of your Schedule Editor is just one of the ways you can make your MusicMaster yours! Have any questions? Contact your Music Scheduling Consultant for help.
Adding Category Info to the InfoBar posted on December 19th, 2016
By Dave Tyler
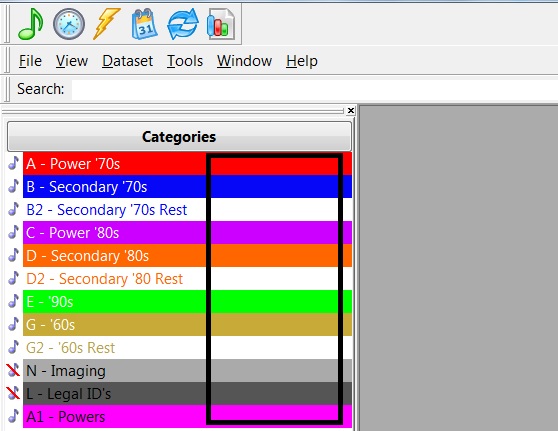
I will be the first to admit that I am a bit of an “Info-Geek”! I like having the tools I need and the information I need at my fingertips when I need it. MusicMaster has a couple displays that I now take for granted but when I run across a database that is not using them it drives me crazy! Over in your Info Bar where your categories live there is a big blank area…dead space that could, in my Info-Geek mind be filled with something useful to me.
Well if you are using MusicMaster 5.0 or later then you already can fill that space and you have 3 options to choose from Song Count, Average Run Time & Slot Count.
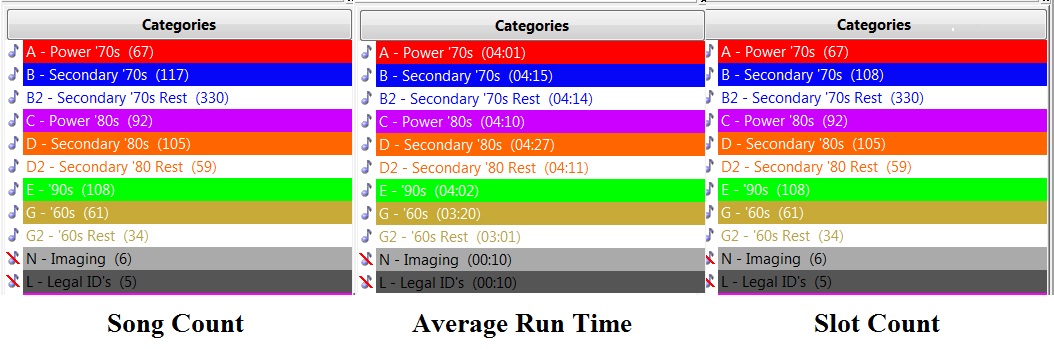
These options are pretty straight forward. Song Count is literally how many songs are in that category. Average Run Time is just that, the average length of the songs within that particular category. Finally Slot Count denotes how many “Slots” are in that particular category. Slot Count can be important to you if you use a lot of packets. You will note in the above example in Category B there are 117 songs in the category (Song Count) but only 108 Slots (Slot Count) because 9 of those songs are packeted in some form or another. These option give you a quick reference to information that may be specifically important to you.
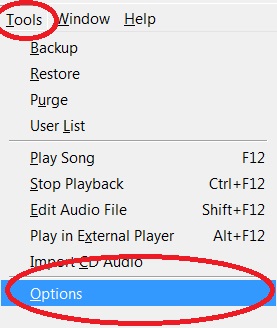
Ok so now I’ve shown something cool now let me show you how to make the magic happen in your Info Bar. Start by going to Tools/Options.
Then go to Library Editor Options and you will see the drop down box with your available options below the heading of “Show Extra Category Information”.
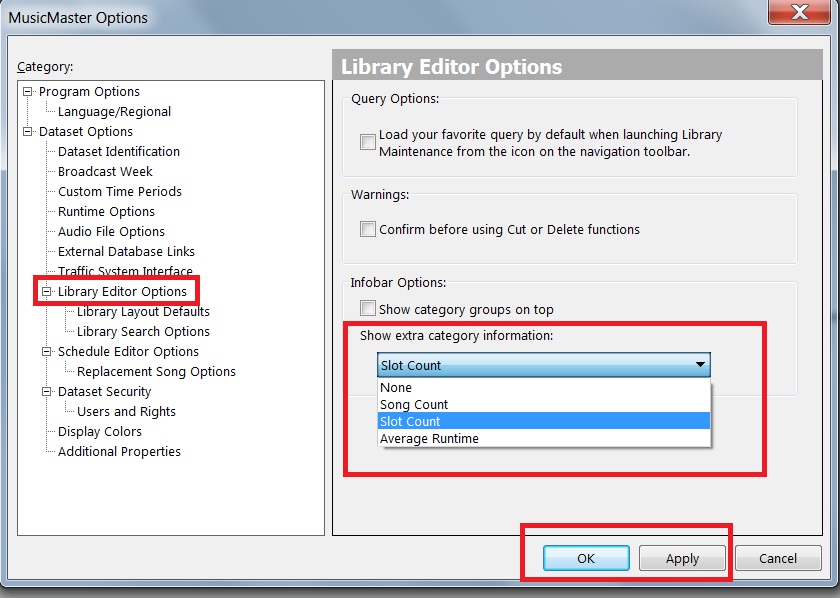
Choose which one of these will be of the most value to you, click Apply then OK and it is done! This additional information is just another great function of MusicMaster that puts the important information you need at your fingertips.
To find out about other time saving functions, if you have any questions or are on an earlier version and want to upgrade your version of MusicMaster to have access to these wonderful features contact your MusicMaster Music Scheduling Consultant.
Making Layout Changes in MusicMaster posted on September 29th, 2014
By Drew Bennett
One of the most common phone calls we get is how to change a layout. Many times, our customers have been so conditioned to accept the layout they are given in a music scheduler like DOS or other Windows-based software that some of them don’t even know they have the choice of what fields to see or not see on the screen! (more…)
How to Add Custom Buttons for User Tools posted on August 20th, 2012
By Drew Bennett
One of the many features we all love about MusicMaster is the ability to customize the look and feel of it. You can change layouts, move windows around, choose to show or hide elements. You can even plug your own logo into the software and print reports or just spruce things up a bit. Now, MusicMaster 5.0 takes customization a step further with Custom User Buttons for your main Toolbar. (more…)